Strays are the creatures of Bramble Vale. Some can join you as companions; all of them will fight you if you cross their path. Pick one for its page: its stats at every level, its kit, where it lives, and how to take it in.
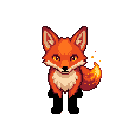
Cindle
3 points · moves 6
A fire-tailed sprinter. In a fight it charges straight at whoever looks softest and shrugs off the hits it takes on the way in.
fire bold striker
Driplet
3 points · moves 5
A shy water sprite. It keeps its distance, soaks its targets and fires from behind rock, and it will take a hit to break away from you.
water shy trickster
Gloomcap
3 points · moves 4
A sleepy mushroom that keeps to the back, puffs slowing spores and grows spore pods on open ground. When it goes down it bursts, and so does any pod you hit: both sides feel it.
no element calm controller stray only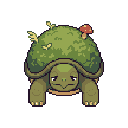
Mossle
3 points · moves 4
A mossy homebody. It holds its ground in cover and on high ground, heals and shields its friends, and roots anyone who comes too close.
moss calm guardian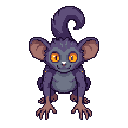
Nookle
2 points · moves 6
A sly little rogue that slips through gaps. It hunts the companion, keeps clear of the hero and pounces on anything knocked down.
no element sly trickster
Pebbling
1 points · moves 4
A rattling little stone that never comes alone. One is easy; three around you add up, because each one next to you makes the next Pile On hurt more. Shove one into water and it sinks.
no element sly minion stray only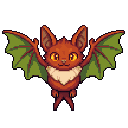
Skreel
3 points · moves 6
A shrieking flier that swoops past its target and lands beyond it. It ignores water and puddles until it gets soaked; wet wings keep it on the ground.
no element sly skirmisher flying stray only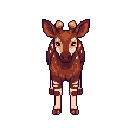
Stripple
4 points · moves 4
A steady, striped guardian. It holds the line beside its friends, then gangs up with them on one target once the line moves.
no element steady guardian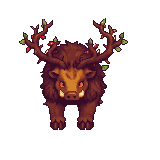
Thornhorn
6 points · moves 4
A bramble-backed brute that cannot be shoved or knocked down. Its charge runs dead straight and hits whoever is in the lane, friend or foe. Step aside so it ends against rock, a barrel or the edge, and it is Stuck.
no element bold brute immovable stray only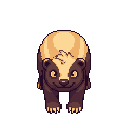
Tussle
4 points · moves 4
A scrappy brawler that lives for shoving you into water, rock and barrels.
no element bold striker
How strays fight
Strays aren't scripted. Every phase each stray weighs every skill it could use, on every target, from every tile it could reach, and picks the best mix of damage, control and a good place to stand, the way its species likes to fight:
- Cindle, the berserker, charges the softest target and ignores the hits it takes on the way.
- Mossle, the warden, holds near home in cover and on high ground, heals and shields its friends, and roots whoever comes close.
- Driplet, the ranged one, keeps its distance and fires from cover.
- Nookle, the rogue, hunts your companion, keeps clear of your hero and loves a target that is down.
- Stripple, the warrior, holds the line beside its friends, then gangs up on one target. Strays that hold back start to advance from round 4, or sooner if you shoot them from out of their reach.
- Tussle, the bomber, lives for shoving you into water, rock and barrels.
Four strays only ever meet you in a fight (The Bramble Stirs); none of them can join you:
- Pebbling, a minion. Weak alone, it piles on in numbers: each other Pebbling next to its target adds to its Pile On. Several Pebblings share one telegraph on the board, marked with how many, and a Pebbling shoved into water sinks.
- Gloomcap, the spore caster. It slows you with spores, grows spore pods that burst on both sides, and bursts itself when it goes down.
- Thornhorn, the brute. It can't be shoved or knocked down, and its Bramble Charge runs dead straight down a painted lane, into whoever stands there, friend or foe. Step aside so the charge ends against rock, a barrel or the edge, and it is Stuck.
- Skreel, the flier. It swoops through its target and lands past it, and it ignores water until it gets soaked.
A stray that would rather hit whoever hit it last, or finish off someone hurt, does so; when two choices score nearly the same, the fight's seed picks.
Squads
A stray costs points, and your duo's level sets how many points a squad spends and how many strays it can hold. A duo fight always spends its points in full. When the companion fights alone or the hero fights alone, it meets a single stray until level 7.
| Stray | Points |
|---|---|
| Cindle | 3 |
| Driplet | 3 |
| Gloomcap | 3 |
| Mossle | 3 |
| Nookle | 2 |
| Pebbling | 1 |
| Skreel | 3 |
| Stripple | 4 |
| Thornhorn | 6 |
| Tussle | 4 |
| Duo level | Points to spend | Most strays |
|---|---|---|
| 1 | 6 | 2 |
| 2 | 6 | 2 |
| 3 | 6 | 3 |
| 4 | 7 | 3 |
| 5 | 7 | 3 |
| 6 | 7 | 3 |
| 7 | 8 | 4 |
| 8 | 8 | 4 |
| 9 | 8 | 4 |
| 10 | 8 | 4 |
Larger squads give each stray a little less HP and damage, so a squad of four is a fair fight, not a wall. Losing a member never makes the others stronger. Minions (Pebblings) count as half a stray toward the cap, and a fight never has more than six strays standing at once.
Elites
25% of fights upgrade one stray to an Elite: 40% more HP, and it fights with more focus on whoever hits it and on the hurt. Its name says Elite. A squad has at most one.
Alphas
Some packs follow an Alpha: more HP, a crown, and an aura that makes every stray close to it hit harder (its ring shows on the board). It howls to shield the pack, and at higher levels it rallies a packmate when one goes down. Bring the Alpha down and the pack wavers.
Morale
When half a pack is down, or its Alpha falls, the timid ones lose their nerve. A shaken stray is slowed, loses its bonus action and hits softer for two phases. A fleeing stray shows its escape path and runs for the edge; root it or knock it down before it gets away. When every stray left is fleeing, you win the fight once the round turns; a runner you're still holding is caught, one that got away gives half its reward. Brutes, Alphas and elites never break, and nobody breaks from round 5.
Enrage
From round 5 the strays enrage: their hits do +2 damage, then +2 more every round after, up to +10. A long fight turns against you, so press. However hard they hit, a stray never takes a fighter at full health straight down: one hit always leaves it standing, if only just.
Stray levels
A stray's level comes from the region it lives in, never from your gear. Better gear and more levels mean the same stray and more wins (levels and difficulty).
Encounters
| Encounter | From level | Objective | The twist |
|---|---|---|---|
| Ambush | 3 | Rout | One stray in sight and rustling at the edges: more arrive on round 2. Stand on a rustling mark, or put a barrel there, and that one never gets in. |
| Break Out | 5 | Breakout | A line of strays between you and the far edge. The bramble there parts on round 5; get through by the end of round 8. |
| Wren's First Fight | 1 | Hold | Old Wren's first lesson on the board, a few steps out of camp: one young Stripple on a small patch of ground. Its NEXT shows where it will hit; step clear, strike, and stay up to the end of round 3 or see it off sooner. Wren calls out tips as you go. |
| Hold the Ford | 5 | Hold | Hold the ford for five rounds. The second pair dozes until round 3, and the deep water on both sides is the best friend a shove ever had. |
| Lone Brute | 4 | Rout | One Thornhorn and the space around it. Bait its straight charge into rock or a barrel, then hit it while it is Stuck. |
| Pack and Alpha | 3 | Rout | A pack led by an Alpha whose howl and aura make every stray nearby hit harder. Bring the Alpha down and the pack wavers; some may run. |
| Pebble Rush | 1 | Hold | An Alpha and wave after wave of Pebblings from the marked edges. Plug the marks and hold out, or take the Alpha down to end the rush. |
| Ranged Nest | 4 | Rout | Shooters behind a wall of barrels, with a front-liner holding the gap. Break the wall or pull the front out of it. |
| Silence the Caller | 4 | Rout | A lookout at the far edge calls for help on round 3. Down it, knock it down, root it and push it, or soak a Skreel caller, and the call never goes out. |
| Skirmish | 1 | Rout | A mixed crossing: a front, a back and a wildcard, and a barrel or two to use. |
| Swarm and Caster | 3 | Rout | A Gloomcap behind a swarm of Pebblings. Spore pods burst on both sides, and fire doubles them: one good blast can turn the fight. |
| Two Camps | 7 | Rout | Two camps at opposite edges. The far one dozes until round 3, a blast or footsteps close by. |
| Wildfire | 1 | Rout | A dry patch already burning, with explosive barrels to make it worse. Puddles are safe ground, and soaked fighters do not burn. |